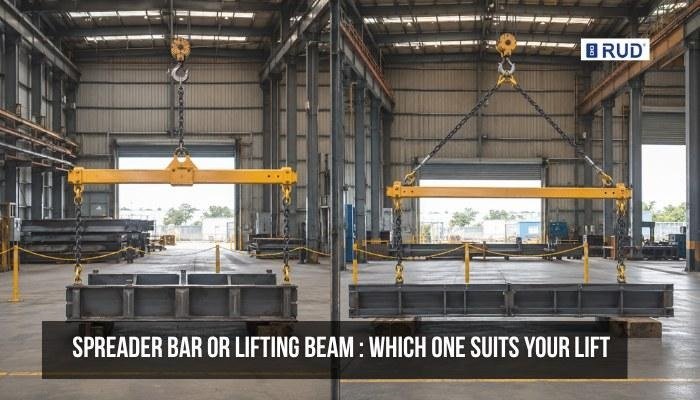

A spreader bar works best for wide, balanced loads. In contrast, a lifting beam handles awkward or off-centre loads in tighter spaces. So the answer to “which one suits your lift” really comes down to what you’re lifting, rather than which device sounds better on paper.
At RUD Australia, we engineer and supply both from our Brisbane facility, with over 150 years of lifting equipment experience behind us.
And here’s where a lot of people get tripped up. And Working Load Limit (WLL) alone won’t tell you the best pick. Your load’s dimensions, centre of gravity, lifting points, headroom and sling geometry all play a part.
So in this article, we’ll walk you through the main differences between spreader bars and lifting beams and what to look for in your next lift.
First, let’s look at what happens inside each device when the crane takes the weight.
Lifting Beam vs Spreader Bars: The Main Differences Under Load
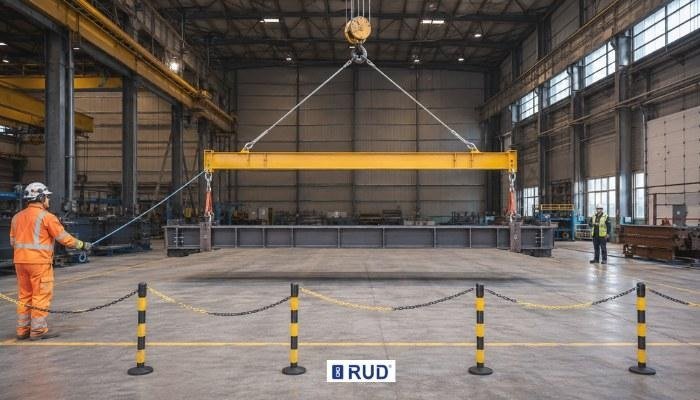
A lifting beam carries your load through bending, and a spreader bar carries it through compression. That single difference affects sling angles, headroom needs and the forces acting on your rigging equipment. Here’s a breakdown of how each device works.
How a Lifting Beam Handles the Load
A lifting beam hooks straight onto the crane from a single point on top, usually through a shackle or a direct pin connection. Your load then connects to two or more points underneath the beam via lifting slings or chain sets.
This setup causes the beam to bend. The crane supports the beam from above while the load pulls down from below. It’s similar to a shelf with heavy boxes on both ends, where the middle bends under the weight.
The single overhead connection also keeps the rigging compact. This can be useful when you need to move a fabricated steel component under structural steel, temporary works or a low ceiling. On indoor construction sites, this extra headroom can be especially useful in plant rooms and under existing gantry cranes.
However, the beam’s working load limit can change depending on where you position the lifting points. So, always check the manufacturer’s load chart for the specific lifting arrangement you plan to use.
How Spreader Bars and Spreader Beams Handle the Load
A spreader bar, sometimes called a spreader beam, rigs in a completely different way. Upper slings run from the crane hook down to each end of the bar at an angle. Lower slings then hang from those same ends straight down to the load.
Those angled upper slings push inward on both ends of the bar. So instead of bending like a lifting beam, the bar mainly resists compression along its length. In simple terms, the forces push the two ends towards each other, which puts the bar under compression rather than bending it.
For a long fabricated component, say a 6-metre steel frame, the benefit is practical. The spreader keeps your lifting points separated at a fixed distance, and the lower slings can sit closer to vertical. That reduces the sideways forces at the load’s connection points.
This is important since hollow sections, thin-walled beams and pressure vessels can buckle or deform when slings pull inward from the sides. Keeping these forces low will help you protect the load during the lift.
Why Sling Angles Change the Rigging Equipment Comparison
Sling angle isn’t just about how the rigging looks on the day. It directly affects how much force each sling leg has to carry.
As the sling gets flatter against the horizontal, the tension in each leg increases. For example, at a 30-degree angle from the horizontal, each sling leg carries roughly twice the load it would carry in a vertical lift.
This is important when choosing between a spreader bar and a lifting beam. A long component may need lifting points that are far apart, and a spreader bar can provide that separation.
However, the upper slings between the crane hook and the bar ends also sit at an angle. So if there isn’t enough headroom to keep these slings steep (such as above 45 degrees from horizontal), the forces will increase. This means the slings, shackles and other connection hardware may need higher load ratings. The crane may also need enough capacity to handle the higher forces.
So, when you compare these two types of rigging equipment, there is a clear trade-off. A spreader bar helps spread the load but needs more height above the bar for the upper slings. On the other hand, a lifting beam needs less headroom, but the beam itself must handle the bending forces and may be heavier as a result.
The right choice depends on the conditions of the lift.
Choosing Rigging Equipment: Centre of Gravity, Headroom and Safety Standards
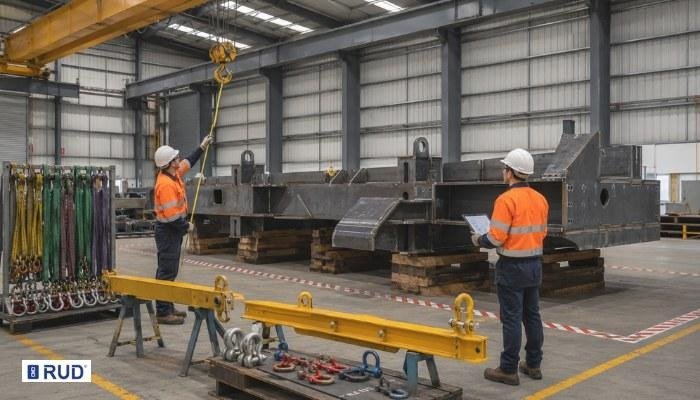
Your choice between a lifting beam and a spreader bar depends on five things. These are the load’s centre of gravity, its approved lifting points, available headroom, sling angles and compliance with safety standards. Let’s see how to work through each one before your next lift.
Start With the Load’s Centre of Gravity
A long load isn’t always a balanced load. Fabricated steel components often carry attachments, varying plate thicknesses or mounted machinery that pull the centre of gravity away from the middle.
This means if the crane hook isn’t sitting directly above the actual centre of gravity, the load will tilt or swing the moment it lifts off the ground. When that happens, it puts unpredictable sideways loading on your slings, shackles and the beam or bar.
The hard part is that a load can look balanced without actually being balanced. That’s why your lifting arrangement needs to account for the load’s actual weight distribution, rather than relying on how it looks.
Confirm the Approved Lifting Points
After you’ve accounted for the centre of gravity, the next step is confirming the lifting points. Every load should have designated or engineered points where it’s approved to be picked up. The spacing between them plays a direct role in which device suits the job.
Closely spaced points, for example, may work well with a lifting beam, since the beam bridges the gap and the slings hang short underneath. Wider spacing, on the flip side, may favour a spreader beam. This is where the bar holds the connection points apart, and the lower slings drop closer to vertical.
Check How Much Headroom the Lift Actually Has
Once your lifting points are confirmed, the next thing to check is headroom. How much space is there between the top of the load and the crane hook? On many construction sites, structural steel, temporary works, pipework and ceilings can reduce this space.
A lifting beam connects directly to the crane hook, so the rigging stays compact above the beam. When headroom is tight, this can make a lifting beam the better option.
But a spreader bar needs more space since the upper slings run from the crane hook down to each end of the bar. If there isn’t enough height to keep these slings steep, they sit at a flatter angle. As we covered earlier, flatter sling angles create higher forces.
Consider Sling Angles and the Complete Load Path
Headroom and lifting-point spacing work together to set your sling angles. And those angles then affect every component in the load path, including the lifting slings, shackles through the beam or bar and up to the crane hook.
However, the Working Load Limit stamped on any single component isn’t proof that the full arrangement is safe. Because changing even one part of the setup can shift forces elsewhere in the system. For instance, widening the lifting points on a spreader bar flattens the upper sling angle, which puts more tension on those slings and more compression on the bar.
That’s why site engineers need to look at the forces through the entire system, rather than checking individual ratings on their own.
See also: The Impact Of Cp As On Business Longevity And Stability
Check WLL, Configuration and Safety Standards
All of the above feeds into one final check: making sure the working load limit applies to the specific configuration you’re using. These are the areas to verify before any load leaves the ground:
- WLL for Your Exact Setup: Adjustable lifting beams or spreader bars with multiple pin positions may carry different WLL ratings depending on the span and lifting-point arrangement. Always check the manufacturer’s load chart for the configuration you’re planning, instead of just the highest rated capacity on the nameplate.
- Regular Inspection and Equipment Condition: Under AS 4991, lifting devices need proof load testing at set intervals. For example, devices rated up to 10 tonnes are tested at twice the working load limit. Over time, worn pins, cracked welds or corroded fittings can drop the capacity well below the stamped rating.
- Lift Plan and Safety Standards: The engineered lift plan, site procedures and relevant Australian safety standards aren’t paperwork you deal with after selecting equipment. They’re part of working out whether the proposed rigging is suitable in the first place.
- Environmental and Site Conditions: Wind, rain, extreme heat or restricted access on site can all affect both the operation and the equipment’s performance on the day. So these need to be factored into the plan.
Get any of these wrong, and the consequences can be serious. You could even face instability during the lift, equipment failure under load, or dropped loads on an active site.
The Right Lifting Beam or Spreader Beam Depends on the Whole Lift
So, has this helped you rethink how you approach your next lift?
Remember, the main point is not to pick a lifting beam or spreader bar based on weight alone. Work through the full picture first: centre of gravity, lifting points, headroom, sling angles, WLL for the actual configuration and the condition of your rigging equipment.
These factors work together, so changing one can affect the rest of the operation. That’s why the right starting point is always the load and the lift plan.
If you need help matching lifting equipment to a specific job, our team at RUD Australia is here. Reach out to get started.