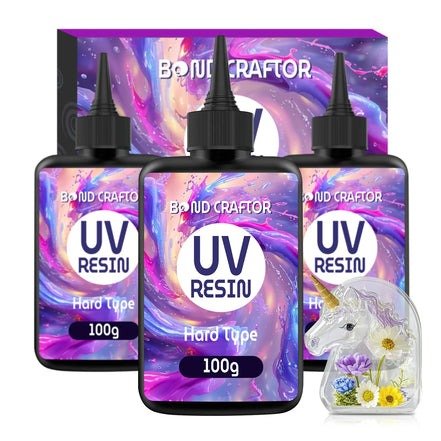

UV resin has gained more popularity among people engaged in Do It Yourself (DIY), jewelry, artists, and craft works due to the need for an easy-to-use product that can help them in making their work. The most important benefit of using UV resin is that it dries out fast on exposure to ultraviolet light.
Whether you are making jewelry, decorative pieces, personalized accessories, or small craft projects, understanding how UV resin works and how to use it properly can make a noticeable difference in the final result. From selecting the right materials to achieving a smooth finish, a few basic techniques can help beginners and experienced makers alike.
What Is UV Resin?
UV Resin is a polymer liquid that hardens on exposure to ultraviolet rays. The difference between UV resin and two-part epoxy resin is that UV resin is already mixed in a container and requires the user only to expose the piece to ultraviolet light after applying it and adding decorative materials to it.
It thus makes the resin very convenient for small crafts as it gives one more time to work on their craft because there is no need to mix the resin and hardener. When the material cures completely, it turns into a hard piece with a smooth surface.
The process of curing is one of the reasons why this resin is widely used. This way, you are not restricted to waiting for a long time for the resin to cure.
Why Is UV Resin Popular?
The most appealing quality of the UV resin is convenience. The fact that there is no need to have an additional hardener to measure and mix means that the procedure may become easier. It may come in handy for beginners who are just getting acquainted with resin properties.
The other feature is that you can work with it in smaller chunks. You can apply resin in a specific area and then build upon your creation. It may be useful when creating intricate designs.
A glossy finish may be one more feature to choose UV resin. If it cures correctly, it will give a polished result.
Common Applications
The UV resin can be employed in numerous creative endeavors. One of the most frequent applications is jewelry making. It allows makers to produce various items, such as pendants, earrings, rings, charms, and embellishments.
It can also be employed for creating miniature crafts and custom items. For instance, one may make a miniature item that will include a name, picture, dried flower, or any other appealing design. Since the UV resin begins as a liquid product, one can easily apply it around any details.
The third potential use of UV resin is applying the shiny top layer to various crafts. At times, one can achieve a good finishing touch as well as protect the design underneath it from daily damage.
Nevertheless, the applicability of UV resin greatly depends on the type of work that one plans to do. It is easier to apply UV resin to smaller projects.
Preparing Your Workspace
It is necessary to prepare for work with resin correctly. It is recommended to check that the surface of the workspace is clean and even. This precaution is required since dust and other small particles might get inside the uncured resin, which may influence the final result of the work.
Also, it might be good to gather all the materials that are needed beforehand. After the application of the resin, it will be necessary to work quickly since the curing time will be quite limited. Therefore, having prepared all the molds, decorations, instruments, and UV-light will help.
It is advised to follow all the safety rules offered for the specific resin product. Using the appropriate environment and minimizing skin contact will be reasonable measures.
How to Get a Smooth Finish
To have a perfectly polished result, one must consider proper application. Do not apply more resin than is necessary because this will cause it to run over in some places.
Furthermore, bubbles will be another problem affecting the final result. Properly applying resin is one way of reducing the number of bubbles that form. In case of the presence of bubbles, one must use the techniques provided by the manufacturer rather than heat.
Curing is another essential thing in achieving a perfect result. Resin must be exposed to the right type of UV light for the correct period of time, which depends on the resin used.
The time taken for curing does not depend on the thickness of the resin but rather depends on the instructions of the particular resin used. Just because something looks solid does not mean it is cured properly.
Working With Decorative Materials
Some of the creative opportunities offered by resin include combining it with various decorative materials such as glitter, pigments, dried little flowers, decorative flakes, and many others.
However, there are some materials that cannot be used together with the resin. Materials with water content might be problematic, whereas large or inappropriate materials might prevent proper curing of the resin. Therefore, before including any decorative material in a project, it is necessary to know the effect it would produce.
In the case of layered projects, proper curing of each layer might be helpful. In this way, it will be possible to place decorations correctly and not all at once.
Common Mistakes Beginners Should Avoid
One of the common errors made by beginners is applying too much resin. Since UV light must penetrate the resin for curing purposes, this may lead to incomplete curing inside the resin.
Rushing the curing process is another mistake that one should avoid. In most cases, even after the surface hardens, the resin will still need time to cure.
Contaminants like dust particles, moisture, and fingerprints can be trapped inside the resin during application if proper measures are not taken.
An incorrect choice of the mold or decorative items may also alter the results. It is important to check the compatibility of all items used with the resin.
UV Resin vs. Other Resin Options
However, UV resin and epoxy resins have different uses. For instance, UV resin comes in handy when one is making a smaller project since it can cure within a short while using UV light, and there is no need to mix two parts.
On the other hand, epoxy resin is commonly used when someone is making a bigger project and pouring a thick layer of the material. One should measure and mix the material and the hardener, then allow it to cure after some time.
There is no best among the two, but what matters is the project at hand.
Tips for Better Results
A few simple habits can improve the overall experience of working with UV resin. First, read the product instructions before beginning. Different formulations can have different curing requirements.
Second, always build up your work in thin layers instead of doing it all at once in one go. Thin layers tend to be easier to manage and cure.
Third, be sure to keep the work area clean. Just a speck of dirt may show when it’s embedded in a clear surface.
Finally, always test out your skills on a cheap project before taking up a difficult one. It will give you a chance to experiment with techniques without wasting expensive materials.
Final Thoughts
Ultraviolet resin is one of the most useful materials for those crafters who wish to produce unique, shiny, and good-looking small crafts. The easy application, fast curing, and compatibility with different techniques make it popular in jewelry making, miniature creation, and other similar projects.
Getting familiar with the materials, their properties, and characteristics is the way to obtain the best results while working with them. Good preparation of the workplace, proper layer thickness, right decoration materials, and full curing are necessary for the successful work with UV resin.
For all those who would like to try their hand in the area of resin craft-making, starting from the simplest projects is a great way to gain confidence and get more experienced.